How to fund Solo Dex Wallet with XRP from Coinbase.

Step 1: Transfer Money from Bank to Coinbase

  1. Sign Up or Log In to Coinbase:

    • If you don’t have a Coinbase account, create one by signing up with your email and verifying your identity.

    • If you already have an account, log in.

  2. Link Your Bank Account:

    • Go to Settings > Payment Methods.

    • Select Add a payment method.

    • Choose Bank Account and follow the prompts to securely link your account. You may need to log in to your bank via Coinbase or manually verify small deposits.

  3. Deposit Money into Coinbase:

    • Navigate to Assets or Portfolio.

    • Select Deposit Funds.

    • Choose the linked bank account as the funding source.

    • Enter the amount you wish to deposit and confirm the transaction.

    • Bank transfers may take 1–3 business days to process.

Step 2: Trade for XRP on Coinbase

  1. Verify XRP Availability:

    • Ensure that XRP is available for trading on Coinbase in your region. XRP trading may be restricted in some jurisdictions.

  2. Buy XRP:

    • Navigate to Trade on Coinbase.

    • Search for XRP in the list of tradable assets.

    • Select the XRP/USD (or your local currency) trading pair.

    • Choose Buy and specify the amount of XRP to purchase. Alternatively, enter the amount of fiat currency you wish to convert to XRP.

    • Review the transaction details, including fees, and confirm the purchase.

  3. Check Your XRP Balance:

    • After the purchase is complete, go to Assets or Portfolio and ensure the XRP balance reflects the purchase.

Step 3: Send XRP to Your SOLO DEX Wallet

  1. Set Up a SOLO DEX Wallet:

    • Download the Sologenic DEX app.

    • Create a wallet and securely back up the recovery phrase. Do not share this phrase with anyone.

    • Locate your XRP deposit address within the SOLO DEX app.

  2. Send XRP from Coinbase:

    • In Coinbase, go to Assets or Portfolio, and select XRP.

    • Click Send or Withdraw.

    • Enter the SOLO DEX wallet address and destination tag (if required).

      • A destination tag is necessary to correctly route your XRP to your SOLO wallet. Confirm the destination tag in your SOLO DEX wallet.

    • Specify the amount of XRP to send.

    • Double-check the address and destination tag (if applicable) to ensure they are correct.

  3. Confirm the Transfer:

    • Review the transaction details, including network fees.

    • Confirm and complete the transfer.

    • The transaction may take a few minutes to process on the XRP Ledger.

  4. Verify the Deposit on SOLO DEX:

    • Open the SOLO DEX app and check your wallet balance to confirm receipt of the XRP.

Tips for a Smooth Transaction:

  • Double-check Addresses: Cryptocurrency transactions are irreversible. Ensure the wallet address and destination tag (if applicable) are accurate before confirming any transfer.

  • Keep Track of Fees: Be aware of fees at each stage, including Coinbase’s trading fees, withdrawal fees, and XRP network fees.

  • Enable Two-Factor Authentication (2FA): For added security, enable 2FA on both Coinbase and the SOLO DEX app.

  • Monitor Transaction Speed: While XRP transfers are typically fast, network congestion can occasionally cause delays.

By following these steps, you can successfully transfer money from a bank account to Coinbase, trade for XRP, and send it to your SOLO DEX wallet. If you encounter any issues, refer to Coinbase’s support or the Sologenic DEX help center for assistance.

How to connect Ledger to Metamask

Importing ETH account from ledger into Metamask

  1. Open MetaMask extension. Make sure it is updated to version 10.5.0 or later.

  2. Open “Advanced Settings” in MetaMask and check that “Preferred Ledger Connection Type” is set to “WebHID.”

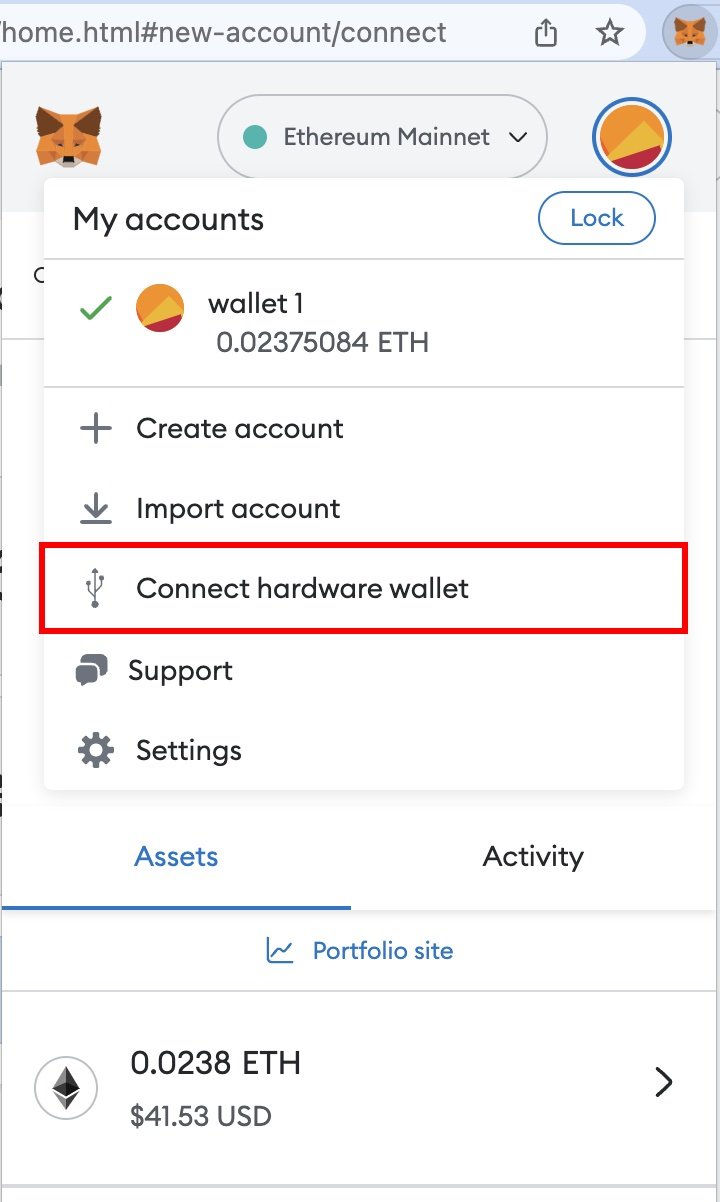
  3. Under MetaMask “My Accounts” in the upper right of the extension, select “Connect Hardware Wallet.”


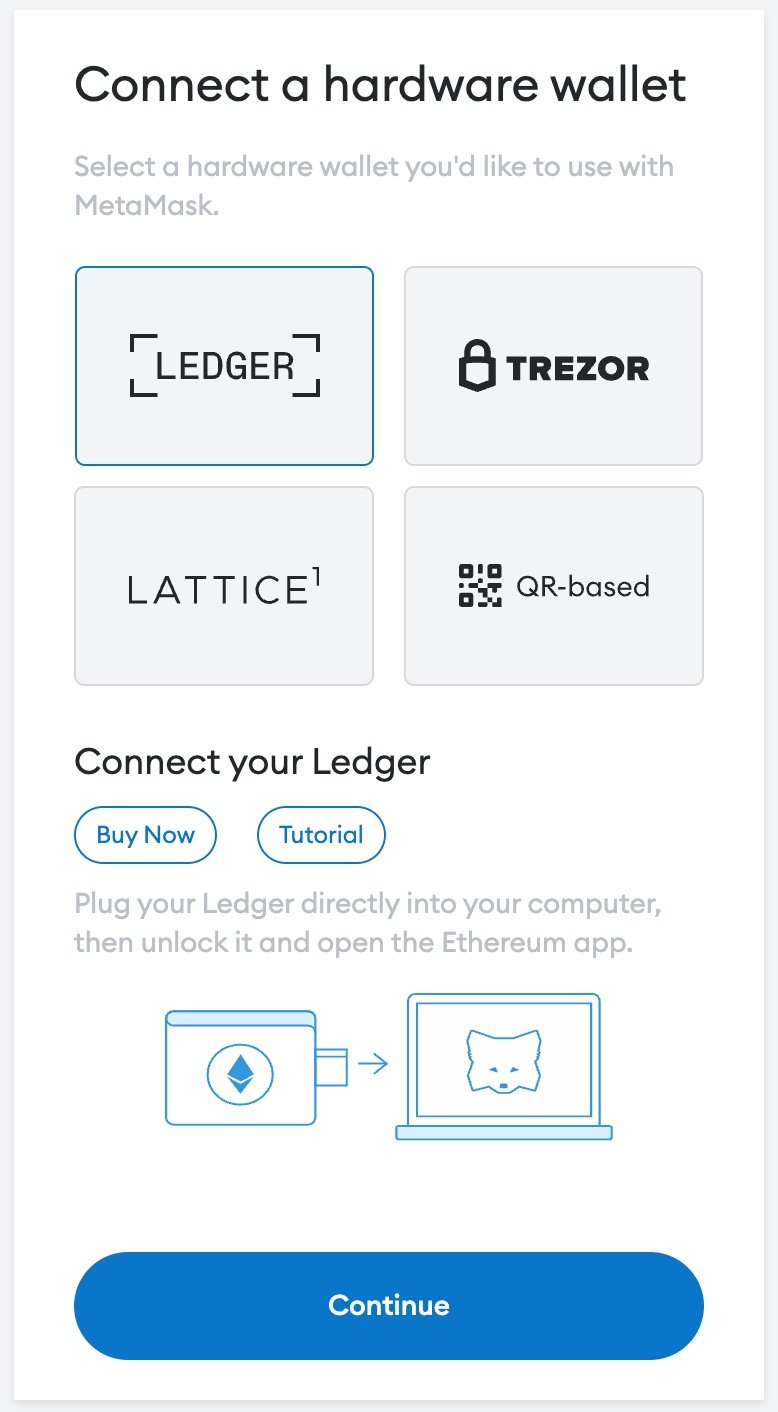
4. Select Ledger. Connect Ledger to the computer, unlock Ledger, and open the Ethereum app on it.


5. Make sure to enable "smart contract data" or "blind signing" on the Ledger device. You’ll need this for signing transactions on dApps.

6. Click Continue in the browser. A popup will appear where you have to select your device to pair.


7. Select the ETH account you wish to import into MetaMask (Ledger Live worked in testing).


8. Click Unlock. If you get an error, make sure to unlock your Ledger device again, then retry.

9. This should have now imported your Ledger’s ETH account into MetaMask.

How to access & earn with OSMOSIS DeFi Exchange

Screen Shot 2021-07-27 at 2.22.39 PM.png

One exciting development in DeFi is the possibility to access new Cosmos Network DeFi platforms. You can access them straight from Coinbase. To do this we will require ownership of ATOM (can buy on Coinbase) a Keplr wallet extension for Brave and we will connect to https://osmosis.zone in order to earn OSMO governance tokens.

This guide will walk you through how to use Osmosis’s key features from start to finish. For the sake of simplicity, we’ve divided this guide into three main sections:

  1. Funding your Osmosis account with ATOM

  2. Swapping assets (Atom for OSMO)

  3. Providing liquidity 

1. How to Fund Your Osmosis Account

Step 1.1: Buy ATOM 

You can purchase ATOM from every major exchange in the world. Below are a number of exchanges you can use: 

Coinbase 

Kraken

Crypto.com

Binance

Step 1.2: Install the Keplr Wallet browser extension

In order to use Osmosis you need to create a Keplr Wallet. Go to the chrome web store and click the “Add to chrome” button at the top right of your screen.


Step 1.3: Create a Keplr wallet

Once you’ve installed the Keplr Wallet browser extension follow the instructions in this Keplr wallet setup guide

Step 1.4: Send ATOM to your Keplr Wallet

Step 1.5: Open Osmosis

Now that you have ATOMs in your Keplr Wallet, you’re going to want to open Osmosis

Step 1.6: Connecting your Wallet

Once you’ve opened the Osmosis web app, you need to connect your Keplr Wallet. Sign in to your Keplr wallet extension if you haven’t yet, and click “Connect Wallet” at the bottom left of the Osmosis page.

Step 1.7: Depositing assets into Osmosis

Now, this is the first time you’ll be using IBC! In order to use Osmosis, please follow these next steps:

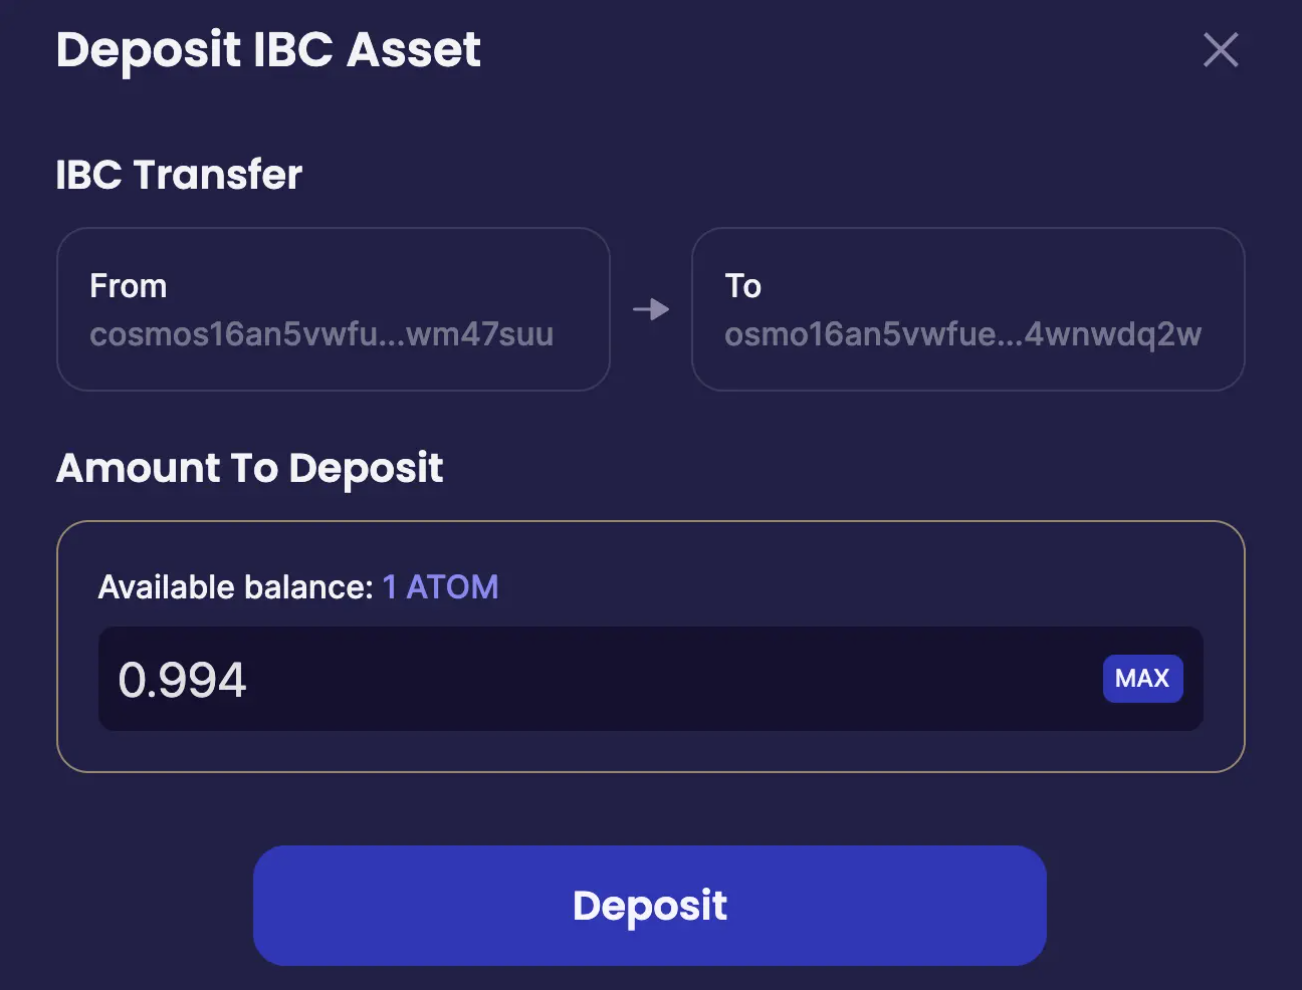
  1. You need to transfer your assets from your Keplr wallet to Osmosis by using Inter-Blockchain Communication Protocol (IBC). IBC enables different blockchain protocols built with Cosmos SDK to exchange value between each other. 

  2. Go to the menu on the left of the Osmosis page and click “Assets.” On the Assets page, there is a list of available assets including ATOM. Immediately to the right of ATOM you’ll see a “Deposit” button. You’ll want to click deposit 

There are instances where IBC assets take a few minutes to populate. Be patient and refresh your screen.

2. How to Swap

Step 2.1: Swapping

Now you’re ready to swap! Click on the “Trade” tab located at the top left of your screen on Osmosis.

Go ahead and choose which assets you’re swapping from and to. For the purposes of this guide, we’ll be swapping ATOM to OSMO. Because of the set ratio of the OSMO <> ATOM pool, you will want to swap 1 / 2 of your ATOM into OSMO in order to provide liquidity to the pool. (later)

**Important: you need OSMO for gas fees in order to make any trades or add liquidity to a pool. Osmosis has provided a nifty feature to get you started. You can swap atom for OSMO with no gas, by selecting "low” (0$) as the gas fee, it will allow the trade to go through.

Swap ATOM for OSMO

3. How to Add Liquidity to a Pool

For some of you the journey hasn’t ended and by this point you already have both ATOM and OSMO and are ready to add liquidity to the ATOM <> OSMO pool on Osmosis. 

Step 3.1: Choosing a pool

Click the “Pools” button on the options menu to the left of the Osmosis page and you’re going to see a number of liquidity pools from the Cosmos ecosystem that are supported and IBC-enabled.

Each card will show you the Pool number, the asset pair in that specific pool, the estimated APY for providing liquidity, and the pool’s overall liquidity.

For the sake of this guide you’ll be choosing Pool #1, the OSMO <> ATOM pool. 

Step 3.2: Adding liquidity

You’ve chosen the OSMO <> ATOM pool, now you need to add liquidity to that pool. In order to do that, click the “Add / Remove Liquidity” button at the top of your screen. Remember that the OSMO <> ATOM pool is a 1-to-1 pool, meaning 50% of the value of the pool will be in OSMO and 50% will be in ATOM

Add the amount of ATOM and OSMO you would like to provide to this pool to become a Liquidity Provider and earn OSMO and ATOM rewards, as well as OSMO pool incentive rewards.

Click Pool #1

Click the “Add / Remove Liquidity” Button

*Make sure to leave around 1 OSMO for gas in your account to process transactions.

Step 3.3: Bonding your LP Tokens

This is the final step and an important one. 

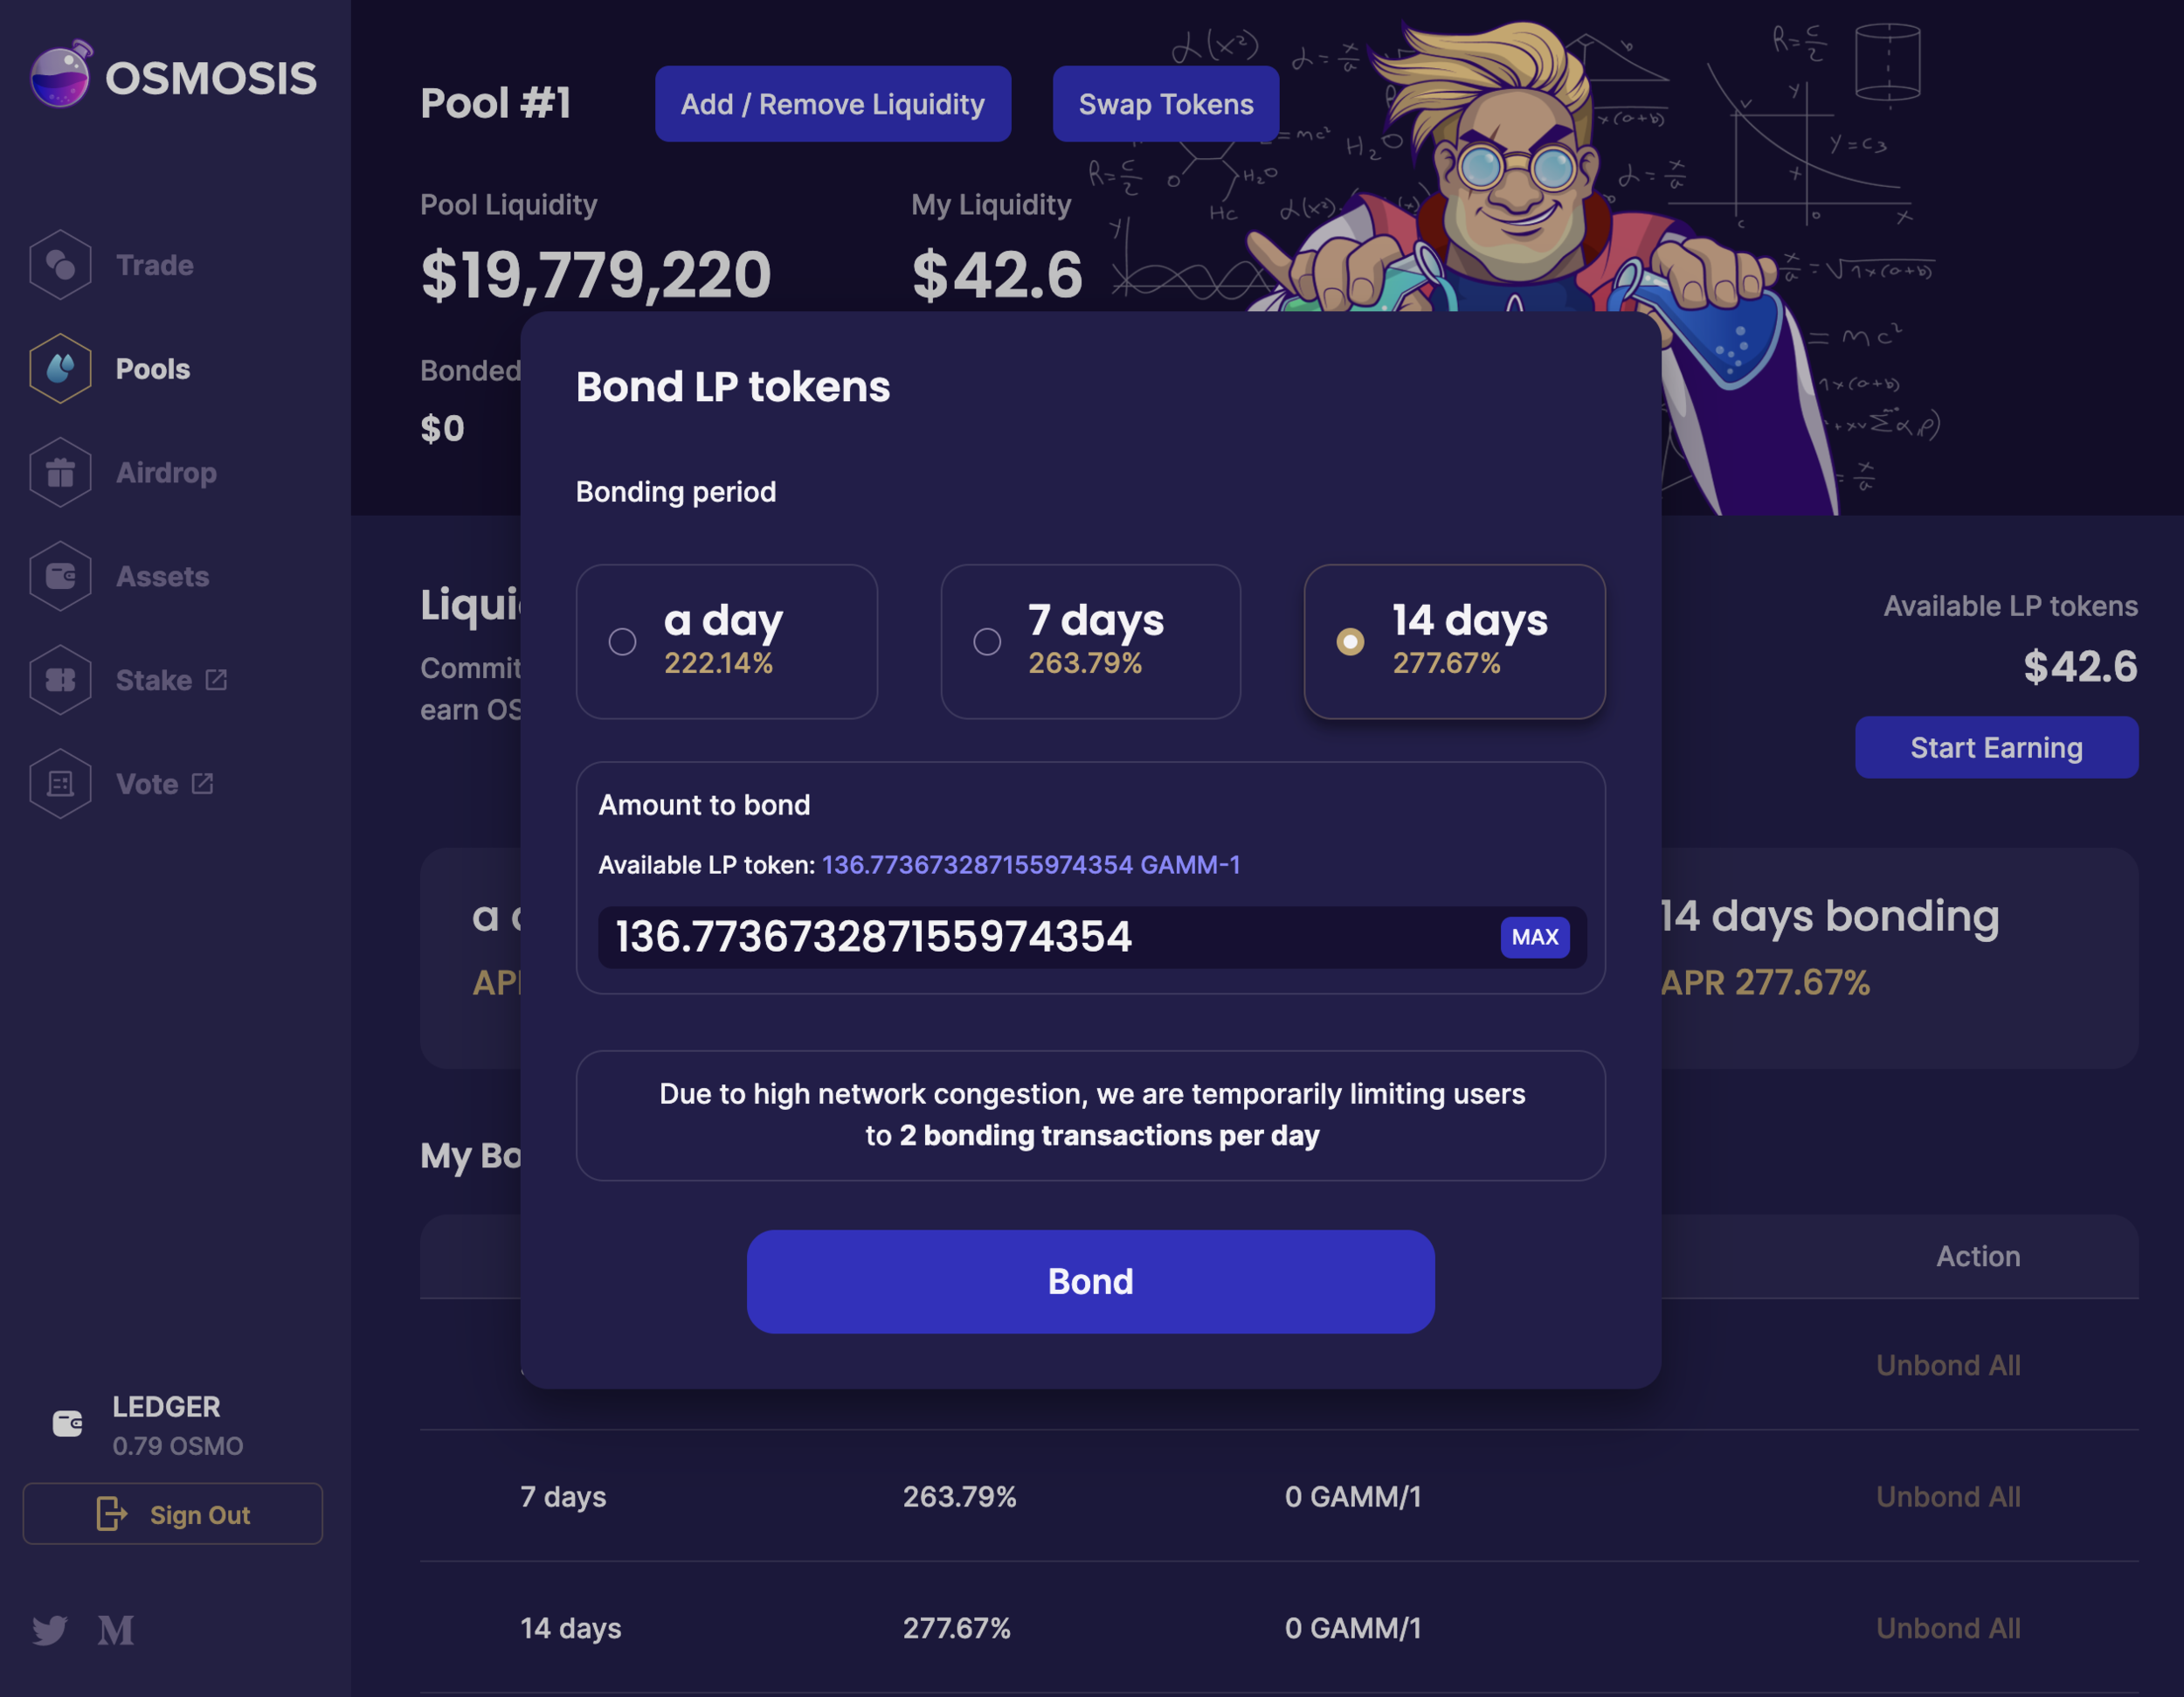
45% of daily issuance of OSMO rewards will go towards incentivizing liquidity providers to bond their LP tokens to promote long-term liquidity on Osmosis’ AMM. Osmosis users can also choose to bond their LP tokens after providing liquidity. Similar to OSMO staking, LP tokens remain bonded for a certain length of time, except users are allowed to choose the length of their own unbonding period. 

You’ll see three bonding gauges below: 1 day, 7 days, and 14 days with the respective APY of each pool. You can choose to unbond your LP tokens at the end of whichever gauge you choose. 

Once you’re done selecting which gauge you prefer, click bond, and you’re done!

You will begin to see your OSMO rewards in your wallet in about 24 hours. It could be less, depending on the time of deposit. To see when the next reward distribution will be, click “Pools”

This post was adapted from https://akash.network/blog/how-to-access-and-provide-akt-token-liquidity-on-osmosis. Thanks!

How to get funds from Coinbase or Binance to Cronos Chain

There are other ways to go about it that might be easier, but this should get you there with almost no gas fees and low slippage.

  1. You're going to need CRO. To get it, and keep gas fees low you can buy ATOM via Coinbase, Coinbase Pro, Binance.com or Binance.us.

  2. If you already have Atom or if by the time you read this, coinbase allows you to withdraw to the Crypto(.org) chain, then skip that step.

  3. Download Keplr Wallet, set it up like you would any new wallet. For more info on Keplr see our guide here.

  4. Send your ATOM from Coinbase Pro to the Keplr Wallet address.

  5. On the Keplr Wallet, you're going to need connect to https://app.osmosis.zone

  6. Go to "ASSETS" and deposit ATOM.

  7. Go to "Trade" and trade ATOM for CRO. (***important: You will need a little bit of Osmo token for transactions. Osmo is a great token to own anyway. So you may just want to pack a little bag.

  8. Go back to “ASSETS” and withdraw CRO. You’ll find your CRO wallet by selecting the “Crypto.org” network in the top/center dropdown in the keplr extension.

  9. Once you see your CRO in your Keplr Wallet, you will need to head on over to crypto dot com's bridge: https://cronos.crypto.org/bridge/. Connect your Keplr Wallet as wallet 1 (from), then your Metamask as wallet 2 (to).

  10. Before you bridge, you’ll want to add CRONOS chain to Metamask. You can 1click add the Cronos chain to Metamask at https://chainlist.org. Just search for Cronos. For more info see below.

  11. https://cronos.crypto.org/docs/getting-started/metamask.html#connecting-to-the-cronos-mainnet-beta. https://cronos.crypto.org/docs/getting-started/metamask.html#connecting-to-the-cronos-mainnet-beta .

  12. Next you'll Bridge your crypto dot com CRO to Cronos CR20 CRO. The bridge is here: https://cronos.crypto.org/bridge/ Since the fees are like 0.2 CRO, I suggest doing a test run and making sure CRO shows up on your MetaMask under the Cronos network.

  13. Now you're ready to trade on DEX’s such as Mad Meerkat, CyborgSwap, and more

How to Access and earn yields on Crypto.com's Cronos Defi Chain

The following is a guide to get you started in DeFi on Cronos Chain.

Step 1: Add Cronos Chain to your MetaMask Wallet:

The easiest way to add Cronos Chain to your MetaMask wallet is to go to Chainlist.org and connect your wallet. Then search networks for “cronos”. Choose the “Cronos Mainnet Beta” option and Connect Wallet. This should set everything up automatically.

If you want to manually install metamask, you can find the instructions here:

Cronos | Crypto.org EVM Chain | Using MetaMask

Step 2: Determine Funding Source

Although there are many ways to fund your MetaMask wallet with the CRO token (the main token used on crypto.com and Cronos Chain), there is a little background we should cover. You will find that the nomenclature used on the crypto.com chains are a little confusing so we’ll try to simplify things.

There are currently 3 types of CRO in existence:

  1. CRO — ERC20 (on the crypto.com exchange and other ERC20 exchanges)

  2. CRO on Crypto.org Chain — Addresses start with cro… — Used on Crypto.com and Crypto.com DEFI Wallet. Also supported by some Central Exchanges (CEX)

  3. Newest Cronos Chain (CR20) — EVM token that starts with 0x… — Used on MetaMask

So, let’s try to determine where your funding will be sourced, here are some options:

  • Bridge funds from another Blockchain (BSC, MATIC etc)

  • A centralized exchange that supports transfer out to Crypto.org Chain (ex. OKex, FTX, KuCoin, I’m sure there is more)

  • A CEX that does not trade in CRO

The Cronos Chain is very new and you could get that “first to market” potential gains; the bad news is that the Cronos Chain is very new and there is a learning curve to get on-board, which is why we’ve cobbled together, this useful guide.

Trying to make this article as newb friendly as possible, it is beyond the scope to go in depth of how to on-board into crypro entirely, but here are a few tips. We suggest you just hop on with Coinbase or Binance, Kucoin.. one of the bigger centralized exchanges and speed up the process and avoid excessive fees. Use of an online resource such as a CEX or a online service like coinbase.com typically require ID / KYC Verification.

** Pay attenction for CEX that do not trade or output to CRO on the Crypto.org Chain

This can be a little tricky, but we will use the most obvious one which is Binance, or Coinbase. The easiest way from Binance or Coinbase to CRO on Cronos Chain is detailed in this article: https://www.illuminati.co/crypto-guides/cujo-the-killer-dog-meme-token-on-cryptocoms-cronos-chain

** A CEX that supports transfer out to Crypto.org Chain

This option was recently tested on the OKex.com CEX.

** Bridge funds from another Blockchain (BSC, MATIC etc)

You can use relay services such as 

https://bridge.evodefi.com (recommended) as of time of this writing, Evodefi will deposit some CRO into your receiving wallet to ensure you can transact. Important

https://anyswap.exchange/#/router 

https://app.relaychain.com/#/cross-chain-bridge-transfer

If sending funds on BSC using Anyswap, make sure your wallet is connected to the BSC chain and transfer funds using BUSD (charges a 0.1% Fee,

And use Relay token with Relaychain:

  • If sending funds on MATIC chain, you can use MATIC (polygon) token but only on relaychain

  • NOTE: There is a $10 fee or higher fee to use these services, but they will save time.

WARNING! If you are using a relay service, you must have some CRO tokens in the receiving Metamask Wallet address on the Cronos Chain in order to have gas to swap back from either BUSD,RELAY or MATIC to CRO or Illuminati or CUJO.

Step 3: Choose a DEX with Farms

So now that you have successfully bridged to CRO in MetaMask on the Cronos Chain, here’s how to get started Yield Farming

Navigate on over to https://dexscreener.com/cronos

NOTE: Across the top you will see all the different DEX’s on Cronos. Most of them have active farms with really impressive introductory APR’s. For this example we will focus on 4 Dex’s

1) VVS Finance (because it’s available in the Crypto.com App).

2) Cronaswap (because they appear to be the big dog on the chain)

3) Crodex (because it’s where Illuminati Token trades with the deepest liquidity)

4) Chronoswap (because they are young and may just have the most risk/reward opportunity)

Other Resources:

Configuring Crypto.com DeFi Wallet to connect to Cronos Mainnet Network

For Crypto.com DeFi Wallet users, the cronos mainnet network will automatically be added into the list of available networks which you can seamlessly switch into.

You can connect to the Cronos Mainnet Network via Settings>Network Settings>Cronos Mainnet.

Bridging Walkthrough Guide

Once your wallet is connected to the Cronos Mainnet Network, you are now ready to bridge your assets into Cronos. Detailed step by step guides for each routes can be found here:

  1. Bridge from Crypto.com App to Cronos [Link]

  2. Bridge from Crypto.com Exchange to Cronos [Link]

  3. Bridge from Crypto.org Chain using Cronos Bridge Web App [Link]

  4. Bridge from Crypto.org Chain using Crypto.com DeFi Wallet [Link]

  5. Bridge from Crypto.org Chain using Crypto.org Chain Desktop Wallet [Link]